Monday, January 30, 2012

Be A Hostess To The Swallowtail:Grow More Dill


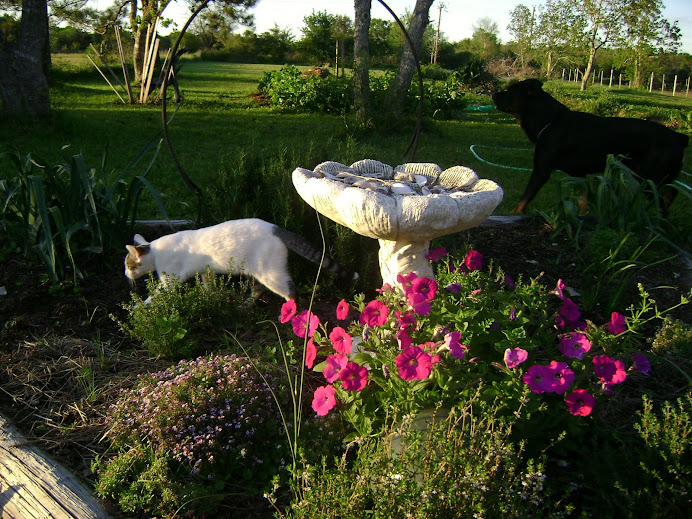
Dill is an herb that is exceptionally easy to grow for most gardeners. In Southeast Texas it loves the cool weather. I plant seeds directly in the garden in fall to go through winter. I also sow Dill seeds again in January and February indoors to put out in early spring. 

I love adding Dill to many dishes. Especially potato salad! But I want to make sure I have plenty of seed heads when pickle making time comes around. I also want to have plenty for saving seed. But more than anything I want to make sure there will be plenty extra for the swallowtail caterpillars.


It is quite important to get familiar with the beautiful swallowtail caterpillar. He or she will munch down a Dill plant in nothing flat. If your planning on just growing a few Dill Plants in your garden you might find yourself in a dilemma. I don't recommend trying to relocate them. The Dill is its host plant until it emerges to its full status of a glorious butterfly.

There are several other flowers and herbs that will serve the same purpose to the Swallowtail such as Parsley, Fennel and even carrots. It would be well for your garden to incorporate all of them. Just be very careful about growing your Dill and Fennel near each other because it is possible for them to cross pollinate each other. As well it is not good to plant Dill with your carrots being that they are both in the Umbelliferae family it is quite possible for them to cross pollinate as well.

Dill is an excellent companion plant for your cucumbers. Must be why pickles are so naturally yummy. It also works well with all the brassicas, beans, lettuce and even onions. I had heard a long time ago that Dill will help repel stink bugs and squash bugs from your summer squash. One year, after harvesting the seed heads, I took the rest of the Dill plants and layed them down between the rows of my squash. I still found stink bugs though, but it was worth a try. 

A beautiful Black Swallowtail

Be sure to not plant Dill with your Tomatoes either. Even though they say Dill helps invigorate your tomatoes growth and I've planted them together several times,  the plants must be monitored closely because Tomato Hornworms enjoy the herb as well. It's best to just keep them away from each other. Trust me!!!

Dill will also attract numerous beneficial insects. The one I find most humorous is a tiny little wasp that likes to lay eggs inside the tomato hornworm. The larvae kill the hornworm. Once in awhile you will find a hornworm that looks like it has tiny white threads all over it. Don't kill that hornworm!!! Let the larvae hatch out and make more tiny little wasps.

I love it when nature helps keep me from touching those nasty things. Although my chickens love to eat them. For more information and how to identify hornworms please visit my recent article at Natural Family Today.

 A spectacular Giant Swallowtail

I hope I've convinced you into becoming a hostess this season by growing plenty of herbs for the swallowtails. They put on such a wonderful display for all to enjoy!!

Happy Gardening!
Pammy


  • Parsley, Lemon Basil, Thyme, Dill, Cilantro / Corriander, Sweet Marjoram, Oregano, Chives, Garlic Chives, Mustard, Savory and Sage
Each packet of Culinary / Cooking Herb seeds contains plenty of culinary herb seed. Exp... [More]
Price: 13.95

Sunday, January 22, 2012

Musing Over Kohlrabi


Kohlrabi is one of my favorite cool weather crops to grow. Fall is the best time to sow seeds in Southeast Texas. I usually sow seeds around 10 weeks or so before the first frost date. They hold up very well throughout the winter months as light to moderate freezes seem not to affect them. 

I avoid many vegetables in the brassicas family in spring here. They always draw to many pests like aphids and cabbage loopers. It is always highly likely it will heat up early here as well and cause many brassicas to bolt to soon. 

If allowed to bloom in spring you will most likely find an very unwelcome guest in the Harlequin Bug.Very nasty creatures that will destroy your garden. They are sort of a boxie armoured shaped bug that look like a ladybug on steroids. 

The first and only time I encountered the Harlequin was a year that I decided to let my Daikon Radishes flower and seed in the spring. From there they advanced to the mustard greens, potatoes, the bean crops and nasturtiums. They just kept laying eggs and growing faster than I could clean them up.

After some research I found that it is solely shame on me for ever growing brassicas in the south during spring. And certainly don't let them flower. 

The best thing to do if you still have some hopeful stragglers from the winter garden is to harvest them before the temperatures even give a hint of heating up. 

I make sure mine are all pulled out by the end of March. Needless to say I've never had a hint of a problem since that one and only horrifying experience. 


I pulled some mulch back in one of the raised beds so you could see how they look when growing. They just sort of bobble on top of the soil with a tap root going into the earth. 

There are many fantastic heirloom varieties to chose, ranging from purple, white and green. I love the look the purple adds to some of our favorite dishes.

Some of my favorite companions to use that will take them through winter are things like lettuce, spinach and onions. They are great grown throughout the herb garden and especially like Thyme, Rosemary, Sage, Cilantro and Dill.

The flavor is exceptionally close to a very mild broccoli to maybe a sweet cabbage. I love it raw best in salads and slaw. Try adding it to stir fries and soups too!! Every part is edible including the pokie stems and leaves. 


I always love sharing my recipes with garden friends. There are times that when I'm putting something together I don't always have exact measurements.My slaw happens to be one of those things that I don't always make exactly the same..but always delicious! 

When I can find my favorite slaw mix made by Concord Farms I grab it. I don't know what it is they do that I simply can't seem to duplicate, but it is awesome. I used it in this recipe for my Kohlrabi Slaw.

Ingredients
 5 medium size Kohlrabi grated (chop some stems and leaves for extra crunch)
3 or 4 medium size carrots grated
About 4 or 5 sprigs of Cilantro cut in small pieces
1 envelope Concord Farms Slaw Mix
A pinch of Sea Salt
A good pinch of sugar
A good dose of fresh ground black pepper
Squeeze the juice from 1 large Lime
A dribble or two of balsamic white vinegar
A dribble or two of your favorite Red Wine (drink a glass while your preparing)
A hefty dollop of plain whole milk Greek God Yogurt

Directions

Combine all your ingredients very well and refrigerate for a least an hour or two. Overnight is superb!!


Happy Gardening!!
Pammy.

Tuesday, January 17, 2012

Growing Your Own Organic Strawberries


Most of us are figuring out that keeping up with the prices of organic foods is incredible. Then it is not just the prices, but where they are being imported from.

Most likely the organic strawberries are not grown in the US because the demand for organic has grown dramatically and we simply are not producing enough organic.

 So when the money belt is tight, do you break down and buy conventionally grown which is most likely immersed in Methyl Iodide/Atrizine and pretend you don't know, or do you quit eating them altogether?

 I say grow your own! It's that simple! I will never give up my precious sweet strawberries. And besides that, you have really never tasted a sweeter berry than one that comes from your garden.

 The question you will have to ask yourself is how serious are you about growing your own strawberries. Is it just going to be a hobby in a pot or are you wanting to grow enough to make some homemade jam, pies, tarts, summer drinks?

Do you want enough to last throughout the year? If this is the case than I can help you get going. As much as I love and appreciate a good looking strawberry pot, I really love pulling down whole organic strawberries from my freezer even more.

One of the nice Big clumps I've dug up to divide Crowns
The beautiful thing about strawberries is that when growing methods are used properly they produce an amazing amount of runners.

Tiny stems that shoot out of each plant and producing new little plants at the end of them. Then each new plant begins with one main crown in the middle.

After the first year a single plant will have formed several crowns. The crowns can also be divided for establishing new plants.So even if you start with a few plants the first year, by the next fall you will have plenty of plants from your humble beginnings.

Here are some tips to get you started.

1. SOIL; prepare your beds.You need a very well drained slightly sandy loam a little high on the acid side. Usually a PH of around 6 to 6.5 works well.

Your beds also need to be rich in organic matter. A lot of composted pine needles mixed in your organic matter seems to help with the PH levels. If at all possible try to plan on growing your strawberries in a well established bed.

 2. VARIETY, is very important. Do a little research to find out exactly what grows best in your garden zone.

What has done the very best in my garden in Southeast Texas is the EVERBEARING SEQUOIA. It is the only type that I grow now after trying a few others as an experiment.

If I had to choose a second variety it would be the Quinault. The everbering is a perennial evergreen plant. It has stood many different tests in climate from hard freezes to extraordinary heat waves and record breaking droughts.

3. The Correct PLANTING TIME is vital. In Southeast Texas and many Gulf Coast areas everbearing strawberries must be planted in the fall for spring berries. This really gives them a jump start to getting well established. A good root system will play an important role when the temperature begin to soar.

4. MULCHING and more mulching. Keep your plants free from bare ground. This will help protect them from soil born diseases. More importantly it helps protect the root system since they are shallow. It helps keep them warm during the cold spells and cool and moist during the hot and dry periods.

More so, as the plants begin to bare fruit it is by far best to never let them lay on bare ground. Just remember to never take the straw out of strawberry. Be Cautious and never cover the center crowns of your plants. Try not to water that area as well.

5. PESTS AND DISEASES to watch for in my area are mainly the fire ants that find their way into the beds and rollie pollies or better known as pill or sow bugs that will find their way to the fruit and eat holes in them.

The quickest way to get rid of a fire ant mound with the least amount of damage to your plants is simply find another mound on the other side of your property, shovel part of it up into a bucket and take them to your strawberry bed. Dump it on top of the hill and the ants will fight and kill each other to the death.

If your just not into fire ant wars I do have a few other organic methods that you can read about in a previous post. 

As far as the pill bugs go, this is why it is important to keep your plants surrounded by a nice layer of mulch like straw or hay. Even pine needles have worked great for us. Pill bugs are actually wonderful for your organic garden. Their job is to help break down the organic matter.

The only plants that have problems with them are strawberries and cantaloupes. They will get into the lettuce and other leafy greens, but they do no damage to the plants.

Keep your strawberry plants clean and free of dead or dying debris. I keep all the dead leaves and stems cleaned off from the bottom of each plant.

The most important disease to be aware of is Verticillium Rot. Be sure you don't chose areas in the garden for your new strawberry plants where you had Tomatoes, Peppers, Potatoes or Eggplants previously growing. .

6. Last but not least is to be sure to create a bit of an environment with partial shade for your plants around the end of June.

The everbearing strawberries with start to become exhausted with producing fruit by this time and the temperatures will begin to soar into the high 90's and even triple digits. We do this by propping up some trellises over the beds.

The trick is to try and keep the soil on the cool side. I have been know to plant cucumbers on the trellis and let them climb on up for even more denseness. The plants will start becoming busy making runners for transplanting in the fall again.

Visit me for an article at Natural Family Today where I describe how to create the best environment for growing organic strawberries. I'll discuss the best companions and combinations for growing in a natural habitat.


Happy Gardening!!
Pammy

Friday, January 13, 2012

Blueberry Cream Cheese Bread


I have to say that this little loaf of bread is just oozing with blueberry and cream cheese goodness. Of course we had to try it directly out of the oven, but actually it was far better the next day. 

It seems when cured overnight the flavors marinated throughout the loaf giving it a more intense flavor. When the time was up for the baking the toothpick came out clean as a whistle.

I adapted this recipe from Tasty Kitchens because the recipe just seemed to speak to me. I had no idea however that once I began pulling out all the ingredients for it what exactly I was in for.

To begin with I was a bit confused, but that is not uncommon for me especially when I have my grandchildren here. But actually I have never made a little loaf of bread that took so many bowls to make it. I think I ended up having to use at least 6 of them. NUTS!!

So onward we marched and then it was giggles and chuckles through the rest of this endeavor. As I'm glancing at the ingredients I had thought the filling for cream cheese said weight watchers cream cheese.

 I was flabbergasted!! With all this sugar??? Hahaha, but the funny ended up being on me because it really just said 8 oz. weight cream cheese, but I didn't figure that out until the next morning. It must be all the new weight watchers commercials on TV that triggered my insanity. 

So the trick to this recipe really, is breaking it down into all these bowls and steps. The reason for this is because you're creating an actual cheesecake filling in the bread. 

Let's just add that it is really really good. So here we go....OH I didn't do the glazed topping...I thought to myself...do we really need this extra sugar?? Especially with the weight watchers thing going on in my head. 

I put the original ingredients from the recipe in red. If you are familiar with any of my recipes, you know that organic is important to me. 

Also when I make this the next time I think some crushed nuts would have been really good in it. I also think an extra bit of vanilla should have been added to the filling. 

I wish I had some fresh orange mint available from the garden for an extra touch to the filling. But that's just my crazy thing.

Ingredients

  • FOR THE BREAD:
  • ½ cups Unsalted Butter (Butter)
  • ½ cups Sugar
  • ¼ teaspoons Sea Salt (Salt)
  • 1 teaspoon Pure Vanilla Extract (Vanilla Extract)
  • 2 whole Organic Free Range Egg Yolks (Egg Yolks)
  • 1-½ cup Unbleached Organic All-purpose Flour (All-purpose Flour)
  • 1 teaspoon Baking Powder
  • ⅓ cups Organic Whole Milk (Milk)
  • 1-½ to 2 cup Organic Frozen Blueberries (Blueberries)
  • 1 Tablespoon Organic Unbleached All-purpose Flour
  • 2 whole Egg Whites
  • ¼ cups White Sugar
  • FOR THE FILLING:
  • 8 ounces, weight Cream Cheese (HA! this is where they got me, but I did make it organic)
  • ½ cups Sugar
  • 1 Tablespoon Flour
  • 1 whole Egg
  • 1 Tablespoon Orange Zest, I actually used a large tangerine
  • FOR THE GLAZE: Totally did not do this!!
  • 2 Tablespoons Sugar
  • ½ teaspoons Vanilla
  • 1 teaspoon Water

Directions

Filling
Be sure you use the ingredients for just the filling here. It is listed separately. In a medium bowl, combine cream cheese, sugar, 1 tablespoon flour, egg and orange zest; beat until smooth.

For the bread:
Cream butter and sugar (1/2 cup) until fluffy. Add salt and vanilla. Add egg yolks (save the egg whites as you’ll need them later) to the sugar mixture; beat until creamy. Set aside.

In another bowl, combine flour (1 1/2 cups) and baking powder. Add this mixture, alternately with milk to egg yolk mixture.

Coat berries with 1 tablespoon flour and add them to the batter.

In a separate bowl, beat egg whites until soft peaks form. Add sugar (1/4 cup), 1 tablespoon at a time, and beat until stiff peaks form. Fold egg whites into batter.

Pour 1/2 of the batter (or a little less) into a floured and greased bread pan. Layer the filling over the batter and then finish with remainder of batter. This will create a layer of “cheesecake” between the blueberry batter.

If you do the glaze, in the original recipe they poured it over the bread before they baked it.

Bake at 350F for 55-60 minutes.


Have Fun in the kitchen and Happy Gardening!
Pammy

Wednesday, January 11, 2012

Why We Grow Heirlooms, Herbs And Natives

Swallowtail in the Bee Balm
Sometimes a picture can tell a story better than words. As I was going through last years photo albums my heart leaped at how far we have come with our garden over the years. This past summer really seemed to tell most of the story.

The Echinasea seemed to be an endless resource for photographing wildlife.
This little Hairstreak Butterfly was only but one of hoards of visitors to the garden. Every tiny little creature counts endless benefits in creating a natural habitat that thrives with not just beauty but health as well.

Texas Gulf Fritillary sits upon a Heirloom Cherry Zinnia

The delicate process of  nectar from a single flower to its pollinator should always be pure and natural. Nature does not require interference from man. No chemicals or pesticides should ever touch a single living creature or human being. I shall plant you again this spring, beautiful Zinnia and you shall be as true as you are forever more.

Bumbling About In The Sunflowers Crown Of Glory

When you've finished bumbling bee, the squash and the pumpkins await their reward.  No one can do your job better than you.For many varieties of squash require a larger bee to pollinate properly. You will be rewarded with baskets filled to the brim with delicious fresh fruit and vegetables when nature works properly.

May My Grandchildren Always Have A Future!

Of course this is REALLY what it is all about. Preserving a future for our children's children.

Happy Gardening!!
Pammy


Saturday, January 7, 2012

Johnny Jump-Up Viola Cornuta


You would think it was spring already in Southeast Texas with temperature today heading to 78 degrees. I know we will surely have some very chilly days before March comes along, but I am so excited to see some signs of color and sprouts all about the garden.
Johnny Jump-ups are one of my favorite wild flowers. They have such a beautiful deep purple and yellow bloom. I do have a few that naturalized as a solid purple and they are just as lovely.
The seeds are best sown in the fall for spring blooms. I've had mine for several years and in mild winters like this one I can go out and dig them up and move them into other areas where I will appreciate them.
They are so lovely during Easter mixed among the early blooming bulbs of the Bearded Iris. This year I'm mixing them with the heirloom purple and red cabbages.
The entire plant is edible and makes quite a display atop a lovely spring time salad. I love the way flowers look on salad. Usually at this time I can add Borage blooms as well for a lovely periwinkle blue.I hope to share a salad or two with a few of my favorite garden friends again this year.
As spring turns to summer here, the Johnny Jump-Ups will soon fade away as the temperatures rise. 
It is a wonderful annual and terrific about reseeding itself and each year you will find more and more.
Give them a tid bit of partial shade by growing them under other taller vegetables and plants in the garden and they will last a bit longer. Keep them in a rich and loose composted soil and you will find them spreading out into a luscious ground cover. 


Nothing says spring is here more than the likes of tiny Violas and naturally Colored Easter Eggs.

Happy Gardening!!
Pammy

Thursday, January 5, 2012

The Three S's For Gardening By Nature


The New Year is always a time for reflection. As I ponder upon my winter garden, I think about all it has endured over the past. And yet it has still produced the most luscious vegetables. As I look out at our crops that include three varieties of gorgeous lettuce, carrots, kale, broccoli, kohlrabi, cabbages, turnips and mustard's and daikons I am amazed how gracious God has been.
Surviving this terrible drought in Texas has been a grave concern and has led to many questions about different methods for growing healthy food as well as a healthy environment for a complete cycle for gardening by nature. Will everything still be in place? Are the earth worms and micro organisms still alive? Will the ladybugs come back in the spring? Will there still be pollinators and lizards left to do their job? 
So as my thoughts have gone through their process, it came to me the three simple S's for success.

Simplicity, Spiritual and Slow

Simplicity ~ Simple reusable and natural. A garden doesn't have to be expensive. Finding new uses for ordinary objects. There is nothing fancy in my garden, other than my own creativity and what nature has created. No fancy hybrids, just simple natives. I find more birds, butterflies and bees in my garden because of simplicity. Nature restored and balance brought forth. No fancy fertilizers, no fancy remedies for this problem or that. Simply let the earth heal by giving back to it. Most of the time it is better to do nothing and let nature do it for you. 

 
Spiritual ~ This one came easy for me, only because of a personal relationship with God. To have a personal relationship with your garden is much the same thing. Getting to know your soil and what it requires. Looking at a plant and understanding its needs. Recently inspired by the origin of Bio dynamics where one studies the wholeness of how all things are connected in nature and when one element is missing it disrupts the entire process and must be mended. Reminiscent of my walk with God as where when one thing is not in place it throws me into a tail spin in other areas of my life. You simply can't take a part out of a perfect plan.

 
Slow ~ Patience really is the best virtue. Not to be in a hurry for instant results. What happens by letting nature come into balance becomes a solid and dependable outcome that will endure all the elements that may come against it. If your new to gardening by nature your property will require time to recover. I think there is almost a 5 year span of time before you really notice a change and the change is remarkable. 

 
Happy Gardening and Happy New Year!!
Pammy