Little Mother Earth

Little Mother Earth

Wednesday, June 30, 2010

Texas Hearty Blue Cheese Salad Dressing

Fresh Herbs are such an inspiration to me for trying so many new recipes. Above is a picture of one of my Cinnamon Basil plants. This is my favorite Basil in the garden. I use it in my herb breads, tomato sauces, meatballs, omelets and salad dressings. It brings such a subtle, sweet flavor to so many dishes.

For those of you who appreciate a really good Blue Cheese or Feta added to your salads or even as a topping to a grilled steak, you will love homemade dressing and never go back to buying bottled store bought dressing again. I've played around a bit with this recipe and really can't think of a thing that could make it any tastier or easier to prepare.

Texas Hearty Blue Cheese Dressing

3 oz. Blue Cheese (crumbled)
3/4 cup sour cream
1 1/3 cup mayonnaise
1 tsp. Worcestershire sauce
1/2 tsp. garlic powder (finely minced fresh garlic is awesome)
1/2 tsp. salt
1/2 tsp. ground black pepper
2 tsp. grated Parmesan cheese
1 tbsp. extra virgin olive oil (or your favorite salad oil)
3 tbsp. white wine vinegar (good quality)
3 to 5 Sprigs of fresh Thyme leaves
3 to 5 Sprigs of fresh Oregano leaves (chopped)
1 med. sized Cinnamon Basil flower (pull off the stem) note: the flowers of most herbs are the best part of most herbs for eating, especially Basil.

In a large bowl, whisk together the sour cream, mayonnaise and Worcestershire sauce. Add all the seasonings. Stir in Blue Cheese. Cover and refrigerate for 24 hours before serving.

Note: You may substitute Feta Cheese for the Blue Cheese.


Above is a picture of one of the many Thyme plants that I grow. My favorites for the southeast Texas area are German Thyme and Lemon Thyme. They stay green all winter in the garden and bring pretty little purple flowers in the summer time. They also spread, creating a ground cover and living mulch. 
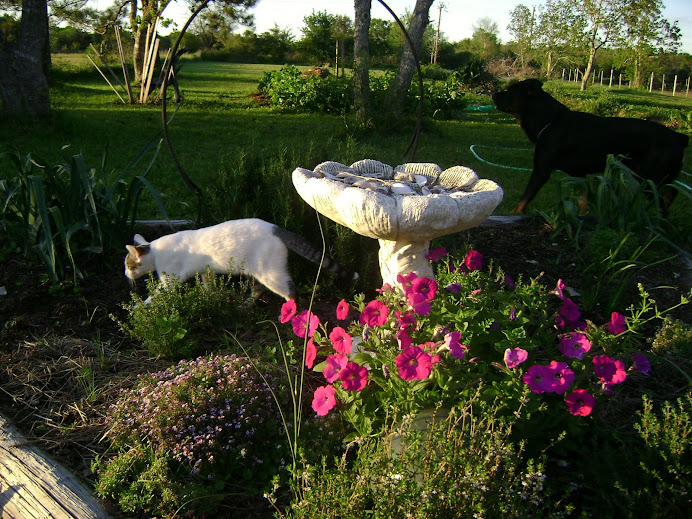
Growing Herbs is such a joy. They can be grown very easily in pots for your patio or porch with little maintenance. I love some in pots to bring indoors during the winter months and place in my kitchen window. The aroma is truly a kitchen therapy.

Happy Gardening!
Pammy

Friday, June 25, 2010

Summer Harvesting


It's such a very busy time in the garden and in the kitchen in June. It's time to start the corn harvest. I'm just finishing the potato harvest and nearing the end of the tomato harvest. My cucumbers will start to be ready by next week so it will be pickle time. This happens to also be time for planning the fall garden. As much as I love going through my seed catalogs for new things to grow for fall, I find it a much easier task in the winter months. I get a twinkle of excitement thinking about falls cooler temperatures and drier air. The temperatures are rising into the mid and high nineties in Southeast Texas in June. By July we will be in the triple digits with equal amounts of humidity. My outdoor gardening activities have become limited to the morning and evening hours. In the middle of the hot afternoon I'm so thankful for the a/c in my kitchen and tall cool glass of ice tea.
I've discovered a few new friends this morning in the garden. There are several swallowtail caterpillars visiting my Italian Parsley which will be ready to harvest for seeds soon. The black swallowtail butterflies are quite a site with the dark turquoise spots against their dark wings. A beautiful garden spider is looming over my newly potted plants and already has a grasshopper wrapped up for dinner. There is also a small bird making a nest in the potting shed. I haven't been able to see her clearly or get her picture yet because she flies out so fast. As she passes me all I hear are the buzzing of wings going past my head. There are no eggs in her nest yet, so I'm assuming she is still busy preparing it for them.Today my thoughts are on my tomato plants. Tomato's are a very important staple in my kitchen and I want to be sure I can put up as many as possible to go through winter. This year I am determined not to have to buy them at the grocery. Our family has eliminated almost all canned products bought in the store. My tomato plants are becoming exhausted from the excessive heat. The blooms on most have slowed down and the tomato's themselves are becoming tougher skinned. It will be time to start pulling the plants out of their raised beds soon and time to start planting new seeds for fall.As I am getting my tomato seeds organized I am labeling cups with each varieties name written on them. I will soak the seeds in a little warm water overnight to help with germination. This is also how I test the seed for quality. By morning I will know that the seeds that sunk to the bottom of the cup are the good seeds and the ones that stayed floating on the top are not good. I've already prepared several flats in the potting shed ready to be seeded and labeled. I'll be planting several different varieties of heirlooms for fall with the exception of two types. It will be very important to keep the seedlings moist as the soil will dry out quickly in the small pots during the summer months. I water them in the morning and again in the evening. I've also made a little heavier soil mix than what I would use for spring. It is basically made from our compost pile, so it is nice and rich and will retain a lot of moisture. It will also aid as fertilizer to the new growing seedlings.

Happy Gardening!
Pammy

Tuesday, June 15, 2010

Companion Planting


BRINGING NATURE INTO BALANCE

In this top photo is a small field of wheat that we inter-planted with Cilantro. We experimented with this combination for several different reasons. One being that the small delicate and lacy white flowers of the Cilantro plant is one of the biggest attractions for the lady bug. As organic gardeners, the lady bug is your biggest helper in keeping aphids under control. I save seed from my Cilantro and always keep it growing everywhere in my garden. I plant it in the fall and it will be up early in the spring chanting with blooms for the lady bug to come. Another benefit to this combination is that the thick mat formed by the Cilantro helped to choke out the weeds and did not interfere with the wheat germination.


In this photo are some of my yellow Cannes. Cannes are another beneficial plant you will find throughout my garden. In each clump of Cannes is a habitat for a whole host of life. This is where the lizards, toads, garden snakes and spiders live and hide. These creatures of God are very important for a healthy garden. They feed on all sorts of damaging insects and animals. Things like grasshoppers, squash bugs, moles and more. It's very important to remember to never use chemicals and pesticides or baits on the bad guys because you will be at risk of harming the good guys. Nature will run its course as things come into balance with each other. Cannes are also a huge contributor to our compost. They spread like wildfire so there is always an abundance of them to add to the pile. They also contain properties that help break down your compost faster.

The Monarch Butterfly adds beauty as well as being a major contributor for pollination. I scatter Dill and Fennel in all sorts of odd places throughout my garden for the Monarch Caterpillar to feed on until its transformation. I still seem to end up with plenty of dill for my ever important pickles. The Dill is also beneficial in helping deter harmful insects like the squash bug and cucumber beetles away from my vegetables. They all work together and what I end up with are clouds of butterflies swarming around my flowers in late summer and early fall. It's an awesome site that I never get tired of watching.
The Sunflower is always so bright with its sunny face looking towards the sunrise. I make sure to plant it on the west side of the property so I can be sure to enjoy the view. It's always an annual I plant every year in my garden. It is a beneficial plant for my sweet corn. It acts as a trap crop for the dreaded stink bugs that might otherwise cause damage to my corn. It also attracts and feeds bumble bees so they may go about their business of pollinating. Sunflowers are also an excellent substitute for sweet corn when growing the "Three Sisters" way of native American Indians. Your beans grow up the stocks of the sunflowers and squash or pumpkins grow very nicely beneath the tall flowers. I have harvested and dried the huge seed heads for the personal pleasure of using the seeds for my homemade breads. It is quite a task that I don't always have time for. This year the seeds will assist with the feed supplies needed to keep my chickens happy and healthy.

Happy Gardening!
Pammy

Wednesday, June 9, 2010

Matt's Super Sonic Cookies


This cookie recipe is actually for my favorite peanut butter cookies. But when your assistant is my 3 year old grandson and as he is watching me put the criss-crosses on with my fork .....well don't ask me why he gets excited and yells "Sonics" with great delight!! Grandma's can't always figure out what's going on in their precious little heads, but we can figure out real quick what makes them happy. So from then on they've become Matt's Super Sonic Cookies. I love the smell of peanut butter cookies baking in the oven. I love eating them warm. But most of all I love eating warm peanut butter (Sonic) cookies with my Grandson Matt!! I hope you will enjoy them too!

Ingredients:

1/2 cup sugar
1/2 cup packed brown sugar (dark brown is best)
1/4 cup butter
1/4 cup Crisco shortening (not the butter flavor)
1/2 cup peanut butter (creamy)
1 egg
1 1/4 cup flour
3/4 tsp. baking soda
1/2 tsp. baking powder
1/4 tsp. salt

Mix sugars, butter, shortening, peanut butter and egg until creamy. In a separate bowl mix together the remaining ingredients with a whisk. Stir the dry ingredients in with the creamy mixture. Wrap it up in wax paper or plastic wrap and refrigerate around 3 hours.

Preheat the oven at 375. Roll the dough into 1 inch balls. Criss-Cross with a fork. Sometimes it's easier if you dip your fork in water while doing this.

Bake about 9 to 10 minutes. Be careful not to over bake. They should still be a bit soft when you take them off the pan and will firm up as they cool.

Enjoy!
Pammy Share on Facebook

Monday, June 7, 2010

Sustainable Gardening


I had a very sweet friend of mine ask me if our garden was for our personal pleasure. I'm so glad she asked that question! What a can of worms she has opened. The first reaction to her question would be absolutely. Gardening is my passion! But of course there is a lot more to my story. I can look back at my personal gardening history and see how much it has changed over the years. When I first began to garden it was small of course and lots of fun. I knew about organic gardening, but I didn't know how to organic garden. My husband and I have 2 acres in Southeast Texas. It has always been very difficult to grow on. When the bugs broke out I didn't really think to much about using something like Seven Dust on my veggies. I didn't think any thing about using Miracle Grow to fertilize. It seemed to be the most popular thing at the garden center and I thought it was the normal thing to use. I now know it's very normal, but normal don't make it right.I always wondered why our land was so difficult to farm. The soil was so poor and had very little top soil. It was sand at the top, but rock hard. Then there is clay in some places only a foot down. Our whole place could have been a giant fire ant farm. I decided to try and do some research to try and find a little more history about our small piece of farmland. What I found was that our land was originally part of a huge farm that grew Watermelons for many years. Watermelons are one of those crops that will deplete all the nutrients in the soil. Without the use of sustainable organic practices, basically the soil becomes raped of all its substance. This farmland was not able to grow a thing without the use of artificial means which are chemical fertilizers, pesticides, herbicides and hybrids.

First on the agenda would be improving the soil. We do this by making our own compost, double digging and collecting all the organic material we can. This is the most economic and productive way to garden without harming our environment. Each new year we expand the garden a little further.

The next goal has been to create a natural environment. I love this part the most. I have studied and put into practice the use of diverse and companion planting. It's almost like thinking of a forest floor and how things grow together. You start ending up with your own little eco-system. Everything begins to work together. The birds, the insects, the herbs and flowers are all to be seen on the surface, only because of what is going on beneath the surface.

My favorite story is a perfect example of how things work together. It is called "The Legend of the Three Sisters." This is a Legend of the Native American Indians.

In late spring, we plant the corn and beans and squash. They're not just plants- we call them the three sisters. We plant them together, three kinds of seeds in one hole. They want to be together with each other, just as we Indians want to be together with each other. So long as the three sisters are with us we know we will never starve. The Creator sends them to us each year. We celebrate them now. We thank Him for the gift He gives us today and every day.
- Chief Louis Farmer (Onondaga)

The story goes: The oldest sister is the Spirit of the Corn. She wears silken tassels that rustle as she moves. The sister called the Spirit of the Bean wears clinging green leaves. She clings to and leans on her older sister for support. The youngest sister is the Spirit of the Squash and Pumpkin. She wears a golden crown and sits at the feet of her older sister.
For the whole story visit the link below:
http://www.ncmuseumofhistory.org/collateral/articles/F05.legend.three.sisters.pdf

Saturday, June 5, 2010

Heirloom Tomato's


I talk a lot about Heirlooms to everyone I know. I simply love them. Especially Heirloom Tomato's. They all have such a unique history behind them. Each one has a story to tell. We started our venture with Heirlooms for several different reasons. One being that all Heirloom's are open pollinated. Basically that means we can save seed from them. The plants (if you really research Heirlooms for your area) will actually become very acclimated to your very garden. Another reason we began growing Heirlooms is because the flavor is totally unmatched. Heirlooms are non-hybrids. Have you ever wondered why the fruit and vegetables you buy at market have no flavor? It's because scientists have altered the plants chemistries trying to improve growing conditions mainly for commercial growers for more resistance to disease and insects. We all do know that most all commercial growers use pesticides and chemical fertilizers. What has happened is that all the flavor has been bred out of the products.

I think my favorite variety of all time is the Purple Calabash Tomato. It is the juiciest and sweetest tomato in my garden. It's so fun to watch them grow into their interesting shapes and the color is beautiful. I love purple!! I first started Purple Calabash because of its unique history. It happens to be a seed that was brought to the south by the slaves from Africa. It was the tomato they grew on the plantation. It is so special to me to be growing the very same seed that they were growing in the 1800's. When I get in my own little garden world, I like to reflect on the peoples of that time and think of them in their gardens growing and cooking with this beautiful tomato. What a strong people for all the hardships they endured. What wonderful dishes the African's of that time introduced to the American food culture. I hope to share some recipes with you and talk more about other vegetables the African people brought to America. For something so precious why would you ever want to harm it with pesticides?
And at the end of the day this is what you get after all your hard work is done!!

The Beginners Bread Machine Loaf


My Organic Summer Garden

I began my journey seeking a pure and natural way to make bread. Once the basic dough recipe has been found successful it shall begin to open a whole new world of endless possibilities. The bread machine is usually the easiest and most comfortable place for most newbie bread makers to begin. It is where I began, but quickly learned that I didn't like bread gone through the complete cycle of baking in the machine. This is not with great effort and several different types of machines. It bakes square and not so light and fluffy and it has a hole in it. Although I just eliminated approximately 128 different chemicals and preservatives out of our diets that each loaf of store bought bread contains, I still love bread and had much higher expectations for it.
I quickly learned how to use the dough only cycle on my machine. It was just a matter of pushing number 9 and waiting about an hour and a half for the machine to beep. All machines are different so make sure you look in the book and it will tell you which number to push. After it beeped, that meant that my bread had gone through the first rise. All I had to do now was turn it out onto a lightly floured surface and pat it down and roll it into a loaf shape. I then lightly oil a loaf pan and put the dough in it. Cover it with plastic wrap or a cotton towel. Put it in a warm place and it will rise for the second and final time. All you have to do is bake it.


Baked Bread on Dough Cycle Only

There are four adults in our family and one 3 year old who all love to eat yummy homemade bread. Especially Pure and natural bread, warm out of the oven without all that stuff that goes into commercial bread, I stay very busy baking around here. I make bread everyday. Usually one loaf a day goes well, but there are the days when I need to make two. Last year I had quite a request for my bread from several people who were willing to buy it. I did it for awhile, but have to say it began to be a little overwhelming for me with all the other tasks at hand. I decided it was sufficient to feed my family and I must say that I'm a much happier camper now. My basic recipe is very easy to make and there are so many variations that one can do with it. One thing you must know about me is the importance of excluding everything possible that contains preservatives, pesticides and chemicals. If you ever google ingredients from your local grocer brand bread you will know exactly what I mean. I also use a bread machine on most days to mix my dough and do the first rise so that I can be about my day and not lose time in the garden.

Basic Bread Recipe

1 cup and 2 tbsp. warm water
2 tbsp. oil ( I recommend Canola, Sunflower, saffron,extra virgin olive oil and even sesame) all very healthy
3 1/4 cup flour (Unbleached)
1 tbsp. dry milk
1 egg (room temperature and cage free)
1 tsp. sea salt
1 tsp. local honey
2 tsp. active dry yeast
Various Seeds and Nuts (Optional)

Directions:

Then the goodies. I sprinkle many different things on top of the mixture into the bread machine pan. One day it could be sesame seeds, raw unsalted sunflower seeds, pumpkin seeds, flax seed, nuts and a variety of Herbs. Just sprinkle it in on the top. There is no need to measure. You will begin to get a feel for what you like best as more experience is acquired. It is also good to crush up some things for more health benefits. Flax seed for instance will pass right through your body. If you run it through your processor or buy it already crushed, then your body will receive all the healthy benefits from the flax.

Put it in your bread machine and punch in the numbers for dough only. Mine takes 1 1/2 hours to complete the first rise. It gives me quite a bit of time to go about other chores. When it's complete, I put the dough on a lightly floured surface and pat it a bit with the flour and turn it over. I then gently roll it out, just enough to get the gas bubbles out.

Add Image
Dough turned out onto lightly floured surface


Rolled up and placed in loaf pan

I then roll it up and put it in a lightly oiled pan. Brush the top with milk or egg white and gently press on your choice of seeds or nuts. Place a towel over it and put it in a warm spot. Depending on the temperature of your baking area will determine how long it will take to become double in size. Usually about 40 minutes here. Preheat the oven to 400.

Add Image
The second rise ready for the oven

It will usually take about 20 minutes to bake. You can test it when you take it out of the pan by tapping the bottom of the loaf. If it sounds hollow and is lightly brown it's good to go. I place mine on a wire rack to cool and hope no one sneaks in for a slice before it's cooled. Below is a picture of my 3 year old grandson getting schooled on the art of making bread as well as cleaning up.

Happy Gardening and Baking!!
Pammy

Thursday, June 3, 2010

Petunia's Love Beans

You will find Petunia's everywhere in my garden. Several years ago I started the spreading type from seed. They really do spread and they get huge and so colorful. They reseed very easily and you will never have to replant them again. I actually find myself having to transplant them in the early spring from sprouts all over the garden and get to replant them exactly where I would like them to be. The Monarch and Swallowtail Butterfly's simply love them. I wanted Petunia's mainly for companion planting purposes. Petunia's are a very good place to begin for all new gardens. They benefit many different vegetables (especially Beans) and even my grapes. They are like a magnet for a whole host of harmful insects such as aphids and the horrible mexican bean beetle. I will find aphids in my Petunia's when I thin them out and next to none on my beans. It's all apart of gardening organically and creating a natural environment. I never use a pesticide or chemical of any sort. It's simply amazing how God had the perfect plan for all things to work together in perfect harmony. It's only a matter of giving it a chance to perform.

Happy Gardening!!